DEON ist eine visuelle Kollaborationsplattform. Sie eröffnet eine völlig neue und intuitive Art der Arbeit und Zusammenarbeit.
Dieses Tutorial vermittelt Ihnen Grundlagen, die Sie für den Einstieg benötigen.
Die DEON KI-Integration DEON Holistic Intelligence mit der KI-Assistenz DAIA wird in diesem Tutorial nicht behandelt. Besuchen Sie dafür bitte die folgenden Seiten:
deon.de/deon-holistic-intelligence/
deon.de/dhi-10-ki-funktionen/
deon.de/help/bedienungsanleitung-daia/
Eine Liste der neuen Funktionen in der aktuellen DEON-Version finden Sie unter https://deon.de/help/whats-new.
Sie können die App unter https://account.deon.cloud/ herunterladen.
Für den schnellsten Lernerfolg überspringen Sie bitte keinen Schritt und lesen Sie jedes NOTE und TIP.
- 1 Einrichtung
- 2 Erstellen Sie Ihr erstes DEON-Projekt
- 3 Text erstellen
- 4 Navigieren
- 5 Screenshots erstellen
- 6 Elemente verschieben und skalieren
- 7 Dateien und Dokumente in den Arbeitsbereich ziehen
- 8 Webbrowser einbetten
- 9 Elemente stapeln, um Gruppen zu erstellen
- 10 Zuschneiden und Ändern der Größe
- 11 Mehrseitige Dokumente
- 12 Vorlagenbibliothek
- 13 Präsentationspfade
- 14 Kopieren zwischen Projekten
- 15 Teilen und Verlinken
- 16 Exportieren
- 17 Versionierung
1 Einrichtung
Nachdem Sie DEON installiert haben, stellen Sie sicher, dass sich das DEON-Symbol in Ihrer Taskleiste befindet (normalerweise unten rechts auf Ihrem Bildschirm): ![]()
Wenn Sie es nicht in Ihrer Taskleiste finden können, müssen Sie es möglicherweise aus dem Bereich der ausgeblendeten Symbole dorthin ziehen:

Wenn Sie es nicht im Bereich der ausgeblendeten Symbole finden können, starten Sie DEON einmal über Ihr Windows-Startmenü oder von Ihrem Desktop aus.
Zurück nach oben2 Erstellen Sie Ihr erstes DEON-Projekt
Klicken Sie mit der linken Maustaste auf das DEON-Symbol in Ihrer Taskleiste ![]() um den DEON-Startbildschirm anzuzeigen.
um den DEON-Startbildschirm anzuzeigen.
Drücken Sie ![]() . Ihr erstes DEON-Projekt wird erscheinen:
. Ihr erstes DEON-Projekt wird erscheinen:
![]()
TIP Sie können auch mit der rechten Maustaste auf das DEON-Taskleistensymbol klicken und „Neues Projekt“ wählen, um noch schneller zu sein.
Zurück nach oben3 Text erstellen
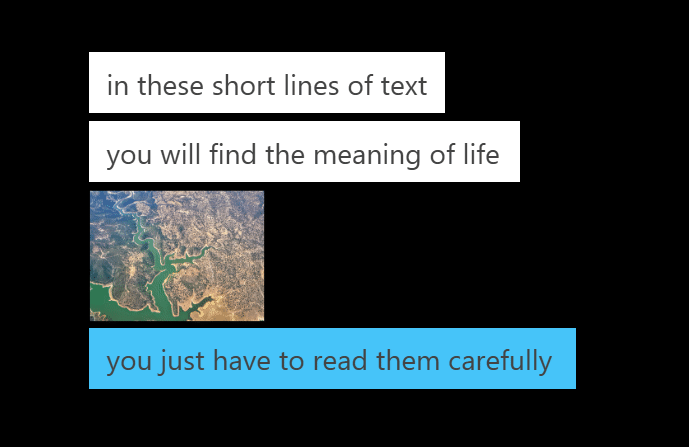
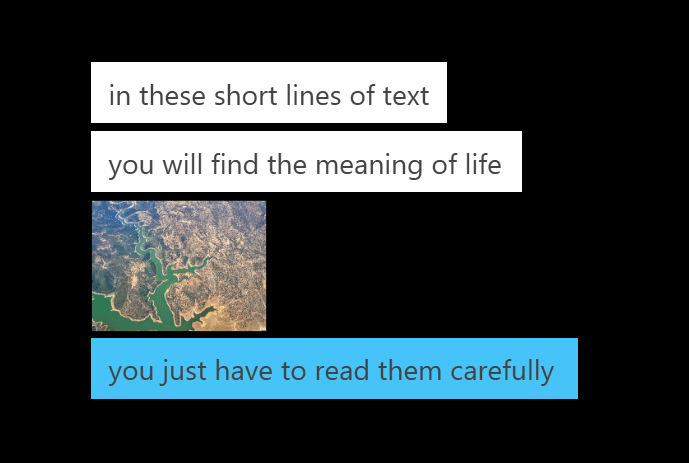
Verwenden Sie das ![]() Textwerkzeug oder drücken Sie Tab, klicken Sie dann mit der linken Maustaste irgendwo in den Arbeitsbereich und beginnen Sie zu tippen. Um den Text fertigzustellen, klicken Sie irgendwo in den leeren Arbeitsbereich.
Textwerkzeug oder drücken Sie Tab, klicken Sie dann mit der linken Maustaste irgendwo in den Arbeitsbereich und beginnen Sie zu tippen. Um den Text fertigzustellen, klicken Sie irgendwo in den leeren Arbeitsbereich.
Erstellen Sie einen neuen Text, beginnen Sie zu tippen, aber drücken Sie am Ende Ihrer Zeile Enter während Sie Ctrl gedrückt halten. Dies startet einen neuen Text unter Ihrem aktuellen.
Platzieren Sie nun Ihren Textcursor irgendwo in der Mitte Ihrer Textzeile und drücken Sie erneut Enter während Sie Ctrl gedrückt halten. Dies teilt Ihren Text in zwei Teile.
Anstatt Ctrl+Enter können Sie auch Tab drücken, um den neuen Text rechts zu erstellen.
TIP Eine vollständige Liste der Tastenkombinationen finden Sie hier
TIP Sie können sogar Abstimmungen mit Textlabels erstellen. Schauen Sie es sich hier an!
4 Navigieren
Verschieben: Halten Sie die rechte Maustaste gedrückt und bewegen Sie die Maus, um Ihren Arbeitsbereich zu verschieben. Dies verschiebt nicht die Elemente (Ihre Textzeilen), sondern nur Ihre Ansicht.
Zoomen: Während Sie die rechte Maustaste gedrückt halten, drücken und halten Sie auch die linke Maustaste. Bewegen Sie die Maus nach oben oder unten, während Sie beide Maustasten gedrückt halten, um zu zoomen. Dieser „Powerzoom“ ist viel besser als die Verwendung des Mausrads zum Zoomen.
NOTE Das Zentrum des Zooms ist immer die Position Ihrer Maus.
TIP Merken Sie sich diese Schritte, um wie ein Profi zu navigieren:
- Bewegen Sie Ihre Maus an den Ort Ihres Interesses.
- Halten Sie die rechte Maustaste gedrückt und bewegen Sie Ihre Maus, um diesen Punkt in die Mitte Ihres Bildschirms zu bringen.
- Halten Sie rechts weiterhin gedrückt und drücken und halten Sie links, bewegen Sie dann Ihre Maus nach unten, um hineinzuzoomen.
TIP Wenn Sie sich im Raum verlieren, drücken Sie ![]() in der Symbolleiste, um das gesamte Projekt zu sehen.
in der Symbolleiste, um das gesamte Projekt zu sehen.
TIP Wenn Sie einen Laptop mit Trackpad, aber ohne Maus verwenden: Legen Sie Ihren linken kleinen Finger auf Ctrl und Ihren linken Zeigefinger auf Space. Halten Sie beide Tasten gedrückt und bewegen Sie Ihren rechten Zeigefinger auf dem Trackpad, um Ihre Ansicht zu verschieben (ohne Trackpad-Tasten zu klicken). Zum Zoomen halten Sie Ihren linken kleinen Finger weiterhin auf Ctrl und schieben Sie einfach Ihren linken Zeigefinger von Space nach Alt. Bewegen Sie dann Ihren rechten Zeigefinger auf dem Trackpad nach oben/unten (ohne Trackpad-Tasten zu klicken).
Zurück nach oben5 Screenshots erstellen
NOTE Sie können Screenshots von jeder beliebigen Anwendung erstellen. Im folgenden Beispiel erstellen Sie einen Screenshot eines Webbrowsers. In diesem Fall speichert DEON automatisch einen Link zur Website für Sie.
- Öffnen Sie eine beliebige Website
- Gehen Sie zurück zu DEON und klicken Sie auf den
 Screenshot-Button im Hauptmenü oder drücken Sie S. DEON bringt automatisch das zuvor aktive Fenster in den Vordergrund (in diesem Fall Ihren Webbrowser) und ein Fadenkreuz-Cursor erscheint.
 - Ziehen Sie einen Auswahlrahmen mit der linken Maustaste
- Ihr Screenshot erscheint im Posteingang unter Ihrem Arbeitsbereich
- Ziehen Sie den Screenshot aus dem Posteingang in den Arbeitsbereich.
NOTE DEON hat den Link der Website automatisch im Screenshot gespeichert. Dies ermöglicht es Ihnen, visuelle Lesezeichen zu erstellen, ohne Zeit mit dem Benennen oder Sortieren herkömmlicher Lesezeichen zu verschwenden.
Wählen Sie den Screenshot im Arbeitsbereich aus (Linksklick) und klicken Sie auf den ![]() Link-Button in der oberen rechten Ecke. Ihr Standard-Webbrowser öffnet die verlinkte URL.
Link-Button in der oberen rechten Ecke. Ihr Standard-Webbrowser öffnet die verlinkte URL.
TIP Der automatische Link funktioniert auch, wenn Sie Screenshots von Dokumenten wie PPTX, XLSX, DOCX oder PDF erstellen.
TIP Sie können einen Screenshot des Projekts selbst erstellen, indem Sie die Umschalttaste gedrückt halten, bevor Sie auf den Screenshot-Button klicken.
6 Elemente verschieben und skalieren
Ziehen Sie Elemente mit der linken Maustaste, um ihre Position im Arbeitsbereich zu ändern.
TIP Um Elemente schnell zu duplizieren, halten Sie Ctrl gedrückt, bevor Sie das gezogene Element loslassen.
Mehrfachauswahl
Um mehrere Elemente zu verschieben, ziehen Sie zuerst einen Mehrfachauswahlrahmen (linke Maustaste) um die Elemente (Elemente müssen vollständig innerhalb des Rahmens liegen) und ziehen Sie dann die gesamte Mehrfachauswahl. Um die Mehrfachauswahl aufzuheben, klicken Sie irgendwo in den leeren Arbeitsbereich.
TIP Indem Sie Alt gedrückt halten, bevor Sie die Mehrfachauswahl starten, können Sie überall eine Mehrfachauswahl durchführen, ohne versehentlich ein Hintergrundelement zu verschieben.
TIP Um ein Lasso zu verwenden, halten Sie Shift gedrückt, bevor Sie die Mehrfachauswahl starten. Das Lasso wählt alle Elemente aus, die von ihm berührt werden oder zumindest teilweise innerhalb des Lassos liegen.
TIP Halten Sie Shift oder Ctrl gedrückt und klicken Sie auf die Elemente oder ziehen Sie einen Auswahlrahmen um die Elemente, die Sie zu einer bestehenden Mehrfachauswahl hinzufügen oder daraus entfernen möchten.
TIP Um mehrere Elemente auszurichten: Ziehen Sie eine Mehrfachauswahl und verwenden Sie dann die ![]() Ausrichtungsschaltflächen im Kontextmenü oder verwenden Sie die Funktion Automatisch anordnen.
Ausrichtungsschaltflächen im Kontextmenü oder verwenden Sie die Funktion Automatisch anordnen.
Skalieren
Um ein Element oder eine ganze Mehrfachauswahl zu skalieren, ziehen Sie an einem der ![]() Skalierungsgriffe an den Ecken.
Skalierungsgriffe an den Ecken.
NOTE Skalieren Sie Elemente nur, wenn Sie ihre Größe wirklich ändern möchten. Wenn Sie sich etwas genau ansehen möchten, skalieren Sie das Element nicht, sondern zoomen Sie stattdessen Ihren Arbeitsbereich. Wenn Sie unsicher sind, ob ein Element zu groß oder zu klein ist, klicken Sie auf den Button ‚Gesamtes Projekt anzeigen‘ ![]() und dann auf den 0-Level-Button
und dann auf den 0-Level-Button ![]() um auf 0-Level zu zoomen. Faustregel: Auf 0-Level passt eine Dokumentseite oder Powerpoint-Folie in den Arbeitsbereich.
um auf 0-Level zu zoomen. Faustregel: Auf 0-Level passt eine Dokumentseite oder Powerpoint-Folie in den Arbeitsbereich.
Smart Align
Die blauen Smart Align-Linien helfen Ihnen beim Ausrichten von Elementen. Sie können Smart Align deaktivieren, indem Sie ein Element schnell schütteln oder den Smart Align-Button ![]() umschalten.
umschalten.
Automatisch anordnen
Verwenden Sie die Doppellinien-Griffe ![]()
![]() um Elemente schnell auszurichten und neu anzuordnen. Um die Abstände gleichmäßig zu dehnen: Wählen Sie alle Elemente aus, schieben Sie sie zuerst zusammen, heben Sie dann die Auswahl auf, wählen Sie sie erneut aus und dehnen Sie sie nach außen.
um Elemente schnell auszurichten und neu anzuordnen. Um die Abstände gleichmäßig zu dehnen: Wählen Sie alle Elemente aus, schieben Sie sie zuerst zusammen, heben Sie dann die Auswahl auf, wählen Sie sie erneut aus und dehnen Sie sie nach außen.
7 Dateien und Dokumente in den Arbeitsbereich ziehen
- Öffnen Sie den Windows-Dateiexplorer, indem Sie auf den Explorer-Button klicken oder Win+E drücken.
- Wählen Sie nun ein Powerpoint-Dokument aus und ziehen Sie es in Ihren DEON-Arbeitsbereich.
NOTE DEON unterstützt viele verschiedene Formate, aber wir werden später in diesem Tutorial eine Powerpoint benötigen.
Kopierte vs. verknüpfte Dateien
Ziehen Sie dasselbe Powerpoint-Dokument erneut in Ihren Arbeitsbereich, aber halten Sie diesmal (kurz vor dem Loslassen) Shift gedrückt.
NOTE Indem Sie Shift gedrückt halten, können Sie zwischen dem Verknüpfen oder Kopieren einer Datei wählen. Eine verknüpfte Datei wird nicht auf den DEON-Server kopiert, sondern es wird ein Link zu Ihrem ursprünglichen Dateispeicherort (lokales Laufwerk, Netzwerkfreigabe oder SharePoint/OneDrive) erstellt.
NOTE Wenn Ihr Datei-Explorer-Ordner ein OneDrive-Ordner war, verknüpft DEON automatisch mit OneDrive und Sie können die Datei direkt im DEON-Arbeitsbereich bearbeiten.
Öffnen Sie nun Ihr ursprüngliches Powerpoint-Dokument durch Doppelklick in Ihrem normalen Windows-Dateiexplorer (nicht in DEON). Nehmen Sie einige Änderungen vor und schließen Sie es wieder (Änderungen speichern). Beachten Sie, dass Sie nach wenigen Sekunden die Änderungen in Ihrem DEON-Arbeitsbereich sehen werden. Die Kopie, die Sie zuerst abgelegt haben (ohne Shift zu drücken), ändert sich nicht, da sie auf den DEON-Server kopiert wurde und keine Verbindung zur Originaldatei hat. Sie können sie jedoch weiterhin öffnen und bearbeiten, indem Sie sie auswählen und den Datei-Button in der oberen rechten Ecke drücken. Das verknüpfte Dokument verfügt zusätzlich über einen Link-Button in der oberen linken Ecke, der Sie zu seinem ursprünglichen Speicherort führt.
NOTE Vorteile verknüpfter Dateien:
- Keine redundanten Kopien.
- Halten Sie die Datei an ihrem ursprünglichen Speicherort außerhalb von DEON zugänglich.
- Sehen Sie Änderungen an Dokumenten in DEON sofort, wenn jemand die Originaldatei außerhalb von DEON geändert hat.
NOTE Beachten Sie bei der Verwendung verknüpfter Dateien:
- Wenn die Originaldatei außerhalb von DEON gelöscht wird oder ihr Speicherort nicht erreichbar ist, ist in DEON nur ein grauer Platzhalter sichtbar.
- Wenn Sie Ihr DEON-Projekt mit anderen Benutzern teilen (wie später in diesem Tutorial beschrieben), stellen Sie sicher, dass diese Zugriff auf die Originaldatei haben (z. B. in einem freigegebenen Netzwerkordner). Andernfalls sehen sie nur einen grauen Platzhalter.
- Wenn Sie Dateien von einem lokalen Laufwerk (kein Netzlaufwerk) auf Ihrem Computer verknüpfen, sind diese in DEON nur auf demselben Computer sichtbar.
Verwendung von Excel-Dateien
NOTE Wenn Sie Microsoft O365 haben, können Sie Excel-Dateien direkt im DEON-Arbeitsbereich bearbeiten. Andernfalls können Sie den integrierten DEON Excel-Viewer verwenden:
- Ziehen Sie eine Excel-Datei per Drag & Drop aus Ihrem Windows-Dateiexplorer in den DEON-Arbeitsbereich. Wenn sie mehrere Blätter enthält, lässt DEON Sie diese auswählen.
- Schneiden Sie die Blätter mit den horizontalen und vertikalen Griffen

 zu.
zu. - Scrollen Sie vertikal und horizontal mit der rechten Maustaste oder zwei Fingern oder verwenden Sie das Mausrad. Um Blätter aus derselben Datei hinzuzufügen, wählen Sie ein vorhandenes Blatt im Arbeitsbereich aus und klicken Sie im Kontextmenü auf „Blatt hinzufügen“
 .
.
Bearbeiten von MS O365-Dokumenten direkt im Arbeitsbereich
NOTE Überspringen Sie diesen Schritt, wenn Sie kein Microsoft O365 haben
Wählen Sie ein Dokument aus, das Sie aus Ihrem Datei-Explorer-OneDrive-Ordner in den DEON-Arbeitsbereich gezogen haben.
Für PowerPoint und Word: Klicken Sie im Kontextmenü auf den MS Office-Button ![]() . Wählen Sie das Dokument erneut aus, warten Sie, bis der grüne Rahmen erscheint, und beginnen Sie mit der Bearbeitung.
. Wählen Sie das Dokument erneut aus, warten Sie, bis der grüne Rahmen erscheint, und beginnen Sie mit der Bearbeitung.
Für Excel: Warten Sie einfach, bis der grüne Rahmen erscheint, und beginnen Sie mit der Bearbeitung.
TIP Sie können auch Dateiordner per Drag & Drop aus Ihrem Windows-Dateiexplorer in den Arbeitsbereich ziehen. Sie erscheinen als Links. Wenn der Ordner nur Bilder mit identischen Abmessungen enthält, erscheinen sie als Diashow.
TIP DEON verfügt über einen integrierten Datei-Watcher namens „Überwachung aktueller Dateien“, der automatisch die aktuellste Datei in einem Ordner anzeigen kann. Dies funktioniert mit Netzwerkordnern und lokalen Ordnern. Die Überwachung aktueller Dateien ist besonders nützlich, wenn Sie mit ständig aktualisierten Versionen desselben Dokuments in einem Ordner arbeiten. DEON sucht automatisch nach der aktuellsten Datei im Ordner, die einer vordefinierten Benennung entspricht. Um die Überwachung aktueller Dateien zu verwenden, führen Sie folgende Schritte aus:
1. Ziehen Sie eine Datei aus einem Netzwerkordner oder einem lokalen Ordner in den Arbeitsbereich. Stellen Sie sicher, dass Sie die Umschalttaste gedrückt halten, bevor Sie die Datei ablegen, um sie zu verknüpfen, anstatt eine Kopie zu erstellen.
2. Wählen Sie die Datei im Arbeitsbereich aus. Drücken Sie im Kontextmenü den Button „Überwachung aktueller Dateien“ (ein Ordnersymbol mit einem Auge darin). Aktivieren Sie das Kontrollkästchen „Überwachung einschalten“ und geben Sie die Zeichenfolge ein, die mit dem Dateinamen abgeglichen werden soll. Optional können Sie auch eine zweite Zeichenfolge hinzufügen und diese mit UND- oder ODER-Logik kombinieren.
8 Webbrowser einbetten
Die einzigartige DEON Metabrowser Engine ermöglicht es Ihnen, Hunderte von Websites und Webanwendungen in jedes DEON-Projekt einzubetten. Sehen und nutzen Sie sie sofort Seite an Seite mit all Ihren anderen Inhalten. Welche webbasierte Anwendung Sie auch immer für Ihre Arbeit verwenden, Sie können sie direkt in DEON nutzen.
Öffnen Sie Ihren bevorzugten Webbrowser, navigieren Sie zu einer beliebigen Website, kopieren Sie die URL (wie https://de.wikipedia.org) in Ihre Zwischenablage, indem Sie sie auswählen und Ctrl+C drücken. Gehen Sie dann zurück zu DEON und fügen Sie die URL in Ihren Arbeitsbereich ein, indem Sie Ctrl+V drücken. Sie können die URL auch per Drag & Drop von Ihrem Webbrowser nach DEON ziehen.
Ein Webbrowser im Arbeitsbereich wird erstellt. Er ist aktiv (blauer Rahmen), wenn Sie ihn auswählen. Um ihn wieder zu deaktivieren, klicken Sie irgendwo außerhalb des Webbrowsers. Um ihn dauerhaft aktiv zu halten, klicken Sie im Kontextmenü auf den ![]() Button „Aktiv halten“.
Button „Aktiv halten“.
TIP Sie können Webanwendungen wie MS Office365 oder Google Docs in Ihrem DEON-Arbeitsbereich verwenden, indem Sie einfach die URLs aus Ihrem normalen Browser einfügen. Oder ziehen Sie Ihre Dateien direkt aus Ihrem OneDrive-Windows-Dateiexplorer-Ordner per Drag & Drop und drücken Sie im Kontextmenü den MS Office-Button ![]() .
.
TIP YouTube- und Vimeo-URLs werden automatisch erkannt und die Videos erscheinen ohne Ränder.
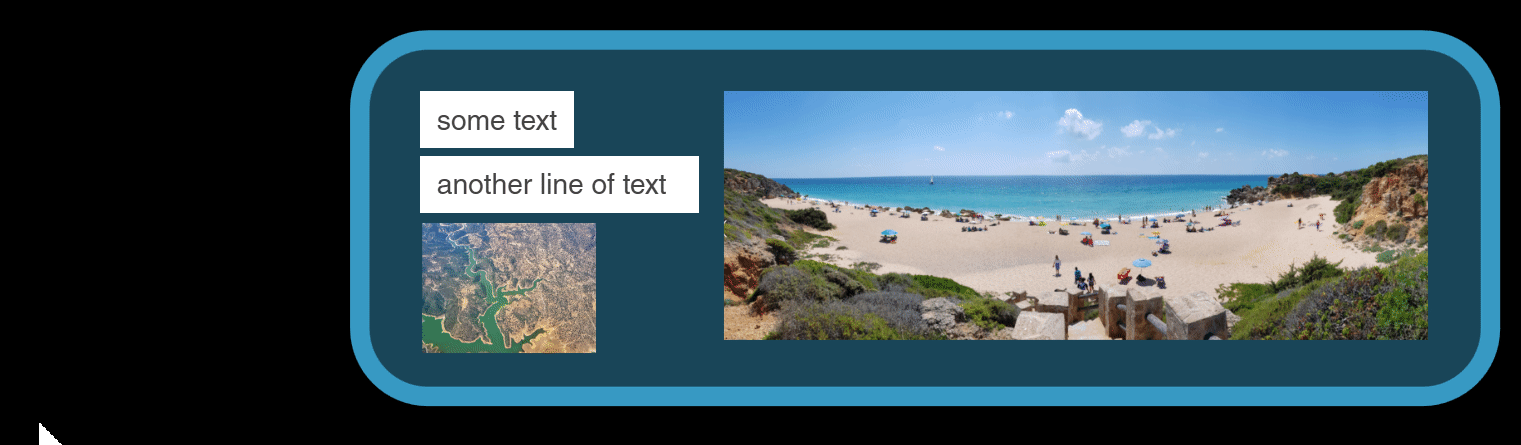
Zurück nach oben9 Elemente stapeln, um Gruppen zu erstellen
NOTE Das Gruppieren von Elementen in DEON ist so einfach wie das Stapeln von Papier.
Wählen Sie mehrere Elemente in Ihrem Arbeitsbereich aus und klicken Sie im Kontextmenü auf ![]() . DEON erstellt automatisch eine Form im Hintergrund der ausgewählten Elemente.
. DEON erstellt automatisch eine Form im Hintergrund der ausgewählten Elemente.
Sie können solche Formen auch manuell erstellen:
Klicken Sie auf den ![]() Formen-Button im Hauptmenü oder drücken Sie M, wählen Sie eine Füll- und Umrissfarbe und klicken und ziehen Sie dann im Arbeitsbereich.
Formen-Button im Hauptmenü oder drücken Sie M, wählen Sie eine Füll- und Umrissfarbe und klicken und ziehen Sie dann im Arbeitsbereich.
Um Elemente aus einem Stapel zu holen, löschen Sie einfach das Hintergrundelement:
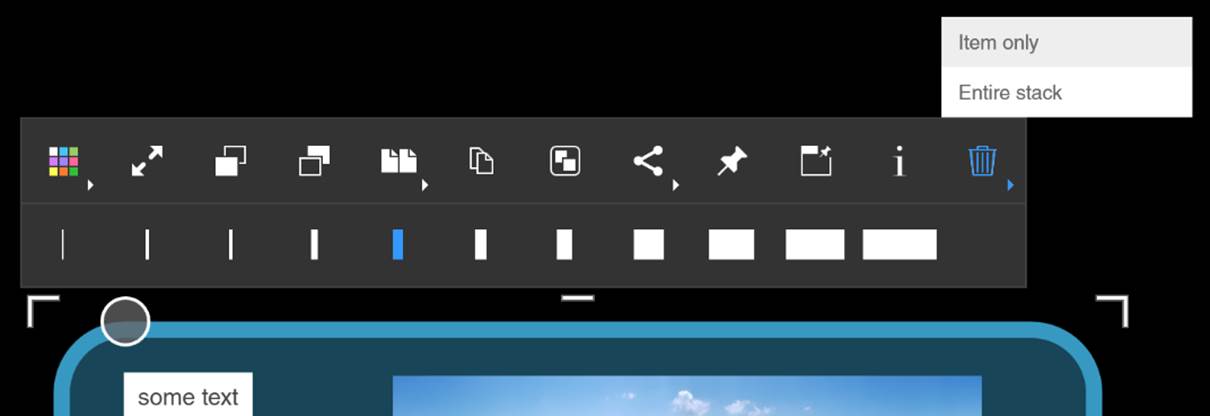
Oder bewegen Sie Elemente einfach vom Hintergrund weg. Wenn Sie vor dem Loslassen warten, erweitert sich die Hintergrundform automatisch. Um diese „automatische Größenänderung“ zu verhindern, lassen Sie einfach schneller los.
NOTE Sie können dieses Verhalten in den Einstellungen unter „Eingabe und Navigation/Auto-Expand aktivieren“ aktivieren oder deaktivieren.
Automatisches Aufsteigen und Anheften
NOTE DEON bringt Elemente automatisch in den Vordergrund, wenn sie von größeren Elementen verdeckt werden:
Probieren Sie es aus, indem Sie eine Form oder ein Dokument über andere (kleinere) Elemente im Arbeitsbereich schieben. Die verdeckten Elemente steigen automatisch auf:
Wenn Sie dies verhindern möchten, heften Sie einfach die Elemente an, die nicht aufsteigen sollen, mit dem ![]() Button im Kontextmenü. Angeheftete Elemente sind mit ihrem Hintergrund „verklebt“ und steigen nur auf, wenn dieser Hintergrund aufsteigt (weil ein größeres Element ihn verdeckt).
Button im Kontextmenü. Angeheftete Elemente sind mit ihrem Hintergrund „verklebt“ und steigen nur auf, wenn dieser Hintergrund aufsteigt (weil ein größeres Element ihn verdeckt).
Anheften verhindert auch, dass Elemente relativ zu ihrem Hintergrund verschoben werden. Wenn Sie ein angeheftetes Element verschieben, verschiebt sich auch sein Hintergrund:
Wenn Sie ein Element direkt an den Arbeitsbereich anheften, kann es überhaupt nicht verschoben werden, bis Sie es wieder lösen.
Das Anheften eines Hintergrundelements hilft Ihnen auch dabei, eine Mehrfachauswahl von Elementen darauf durchzuführen:

Stapel- und Anheftmodus deaktivieren
Dieser Modus kann komplexe Layoutsituationen beschleunigen. Anheften, Stapeln und Aufsteigen werden durch diesen Button ![]() deaktiviert. Sie können dann Elemente verschieben, ohne andere gestapelte oder angeheftete Elemente zu beeinflussen.
deaktiviert. Sie können dann Elemente verschieben, ohne andere gestapelte oder angeheftete Elemente zu beeinflussen.
10 Zuschneiden und Ändern der Größe
Verwenden Sie die ![]() vertikalen und
vertikalen und ![]() horizontalen Griffe, um Elemente in der Größe zu ändern oder zuzuschneiden. Je nach Art des Elements sind die Auswirkungen unterschiedlich:
horizontalen Griffe, um Elemente in der Größe zu ändern oder zuzuschneiden. Je nach Art des Elements sind die Auswirkungen unterschiedlich:
Bilder und Dokumente zuschneiden:
Das Bewegen der ![]() oder
oder ![]() Griffe schneidet das Bild oder die Dokumentseiten zu. Dies ist besonders nützlich für große Excel-Tabellen.
Griffe schneidet das Bild oder die Dokumentseiten zu. Dies ist besonders nützlich für große Excel-Tabellen.
Ändern Sie eine Textzeile in ein schwebendes Textfeld:
Durch Bewegen der ![]() oder
oder ![]() Griffe können Sie eine Textzeile in ein schwebendes Textfeld mit automatischem Umbruch ändern. Gesperrte Griffe erscheinen blau. Durch Doppelklick auf einen Griff können Sie ihn sperren/entsperren. Ein roter Griff unten zeigt Textüberlauf an.
Griffe können Sie eine Textzeile in ein schwebendes Textfeld mit automatischem Umbruch ändern. Gesperrte Griffe erscheinen blau. Durch Doppelklick auf einen Griff können Sie ihn sperren/entsperren. Ein roter Griff unten zeigt Textüberlauf an.
Webbrowser zuschneiden/Größe ändern:
Durch Bewegen der ![]() und
und ![]() Größenänderungsgriffe können Sie einen Webbrowser mit ganz besonderen Abmessungen erstellen. Dies ist praktisch, wenn Sie eine ganze scrollbare Website als ein längliches Bild sehen möchten.
Größenänderungsgriffe können Sie einen Webbrowser mit ganz besonderen Abmessungen erstellen. Dies ist praktisch, wenn Sie eine ganze scrollbare Website als ein längliches Bild sehen möchten.
TIPAchten Sie darauf, es nicht zu groß zu machen. Anders als die ![]() Skalierungsgriffe erhöhen die
Skalierungsgriffe erhöhen die ![]() Größenänderungsgriffe die Auflösung (und Systemlast) des Browsers, wenn Sie den Webbrowser vergrößern. Während bei den
Größenänderungsgriffe die Auflösung (und Systemlast) des Browsers, wenn Sie den Webbrowser vergrößern. Während bei den ![]() Skalierungsgriffen die Webbrowser-Auflösung konstant bleibt, skaliert nur die Darstellung im Arbeitsbereich (genau wie beim Zoomen des Arbeitsbereichs selbst).
Skalierungsgriffen die Webbrowser-Auflösung konstant bleibt, skaliert nur die Darstellung im Arbeitsbereich (genau wie beim Zoomen des Arbeitsbereichs selbst).
Formengröße ändern:
Das Bewegen der ![]() und
und ![]() Größenänderungsgriffe ändert die Größe der Form, behält aber den Eckenradius bei, und Elemente auf der Form behalten ihre Größe. Elemente darauf werden in die Größenänderungsrichtung geschoben, wenn sie den Rand erreichen.
Größenänderungsgriffe ändert die Größe der Form, behält aber den Eckenradius bei, und Elemente auf der Form behalten ihre Größe. Elemente darauf werden in die Größenänderungsrichtung geschoben, wenn sie den Rand erreichen.
Skalieren mit den ![]() Skalierungsgriffen skaliert den gesamten Stapel von Elementen als eine Einheit.
Skalierungsgriffen skaliert den gesamten Stapel von Elementen als eine Einheit.
11 Mehrseitige Dokumente
Bringen Sie das Powerpoint-Dokument, das Sie zuvor in Ihren Arbeitsbereich gezogen haben, in die Mitte des Bildschirms und drücken Sie die ← → Pfeiltasten, um Seiten umzublättern, oder verwenden Sie einen Clicker.NOTE Sie müssen es nicht zuerst auswählen. Wenn es sich in der Mitte des Bildschirms befindet, nimmt DEON automatisch an, dass Sie die Seiten umblättern möchten.
Verwenden Sie den Schieberegler unten, um schnell durch große Dokumente zu blättern:
Wählen Sie das Dokument erneut aus und wählen Sie den ![]() Rasteransicht-Button aus dem Kontextmenü, um alle Seiten auszubreiten.
Rasteransicht-Button aus dem Kontextmenü, um alle Seiten auszubreiten.
Um einen Screenshot einer Seite zu erstellen: Klicken Sie auf das Dokument (falls noch nicht ausgewählt) und dann auf den ![]() Screenshot-Button in der unteren rechten Ecke der Seite.
Screenshot-Button in der unteren rechten Ecke der Seite.
Extrahieren Sie nun eine weitere Seite mit dem ![]() Extraktions-Button in derselben Ecke.
Extraktions-Button in derselben Ecke.
NOTE Der Screenshot ist einfach ein Bild der Seite, während die extrahierte Seite immer noch mit dem Dokument verbunden ist und Sie das gesamte Originaldokument öffnen können, indem Sie den ![]() Datei-Button in der oberen rechten Ecke der einzelnen extrahierten Seite drücken.
Datei-Button in der oberen rechten Ecke der einzelnen extrahierten Seite drücken.
TIPSie können ganz einfach mehrere Powerpoint-Dokumente oder extrahierte Seiten zu einem neuen Dokument zusammenführen: Wählen Sie die Seiten oder Dokumente, die Sie kombinieren möchten, mehrfach aus. Klicken Sie im Kontextmenü auf den ![]() Zusammenführen-Button.
Zusammenführen-Button.
TIP Um eine Seite (oder ein anderes Element in Ihrem Arbeitsbereich) mit entfernten Elementen in Ihrem Arbeitsbereich zu vergleichen: Wählen Sie das Element aus und wählen Sie ![]() Element verankern im Kontextmenü. Das Fenster mit der verankerten Ansicht bleibt vor Ihrem Arbeitsbereich, während Sie an einen anderen Ort navigieren.
Element verankern im Kontextmenü. Das Fenster mit der verankerten Ansicht bleibt vor Ihrem Arbeitsbereich, während Sie an einen anderen Ort navigieren.
Zoomen Sie nun zu einer Seite und drücken Sie den ![]() Einklappen-Button. DEON klappt das Dokument ein, blättert zu dieser Seite und zentriert das Dokument automatisch auf dem Bildschirm:
Einklappen-Button. DEON klappt das Dokument ein, blättert zu dieser Seite und zentriert das Dokument automatisch auf dem Bildschirm:
Anmerkungen auf Dokumenten
Klicken Sie auf ![]() im Hauptmenü oder drücken Sie P um in den Kritzelmodus zu wechseln. Zeichnen Sie einige Anmerkungen auf verschiedene Seiten Ihres Dokuments. Probieren Sie auch die zwei verschiedenen
im Hauptmenü oder drücken Sie P um in den Kritzelmodus zu wechseln. Zeichnen Sie einige Anmerkungen auf verschiedene Seiten Ihres Dokuments. Probieren Sie auch die zwei verschiedenen ![]() Radiergummis aus dem Kritzelmenü aus.
Radiergummis aus dem Kritzelmenü aus.
Um den Kritzelmodus zu verlassen, klicken Sie auf den ![]() Zeigermodus-Button im Hauptmenü oder drücken Sie V.
Zeigermodus-Button im Hauptmenü oder drücken Sie V.
TIP Wenn Sie einen Touchscreen mit einem aktiven Stift (wie Microsoft Surface) haben, wechselt DEON automatisch zwischen Kritzelmodus und Zeigermodus für Sie, und Sie können die Rückseite Ihres Stifts zum Radieren verwenden.
Erstellen Sie einige Pfeile: Klicken Sie auf ![]() im Hauptmenü oder drücken Sie L. Wählen Sie
im Hauptmenü oder drücken Sie L. Wählen Sie ![]() aus dem Untermenü. Starten Sie Ihren Pfeil an einer Textzeile und lassen Sie ihn auf eine Stelle in Ihrem Dokument zeigen. Oder ziehen Sie die horizontalen oder vertikalen Verbindergriffe
aus dem Untermenü. Starten Sie Ihren Pfeil an einer Textzeile und lassen Sie ihn auf eine Stelle in Ihrem Dokument zeigen. Oder ziehen Sie die horizontalen oder vertikalen Verbindergriffe![]()
![]() an den Rändern eines Elements, um direkt Verbinder zu erstellen.
an den Rändern eines Elements, um direkt Verbinder zu erstellen.
NOTE Wenn Sie die Seiten Ihres Dokuments umblättern, bleiben alle Anmerkungen auf ihrer jeweiligen Seite.
TIP Um das PowerPoint-Dokument zusammen mit den Anmerkungen darauf zu exportieren: Klicken Sie auf eine Seite, wählen Sie ![]() Teilen/Exportieren im Kontextmenü und wählen Sie „Exportieren … mit Anmerkungen“.
Teilen/Exportieren im Kontextmenü und wählen Sie „Exportieren … mit Anmerkungen“.
12 Vorlagenbibliothek
NOTE Jeder Inhalt, den Sie in Ihren Projekten erstellen, kann als Vorlage verwendet werden, wenn Sie ihn in Ihrer Bibliothek speichern. Ihre Bibliothek ist in jedem Ihrer Projekte verfügbar. Sie können Vorlagen auch mit anderen Benutzern teilen.
Wählen Sie die Elemente aus oder wählen Sie sie mehrfach aus, die Sie als Vorlage speichern möchten. Klicken Sie im Kontextmenü auf ![]() Teilen/Exportieren und wählen Sie
Teilen/Exportieren und wählen Sie ![]() .
.
Klicken Sie auf ![]() im Hauptmenü, um Ihre Bibliothek zu öffnen. Um zu sehen, wie es funktioniert, können Sie nun Ihre neu erstellte Vorlage per Drag & Drop in Ihren Arbeitsbereich ziehen.
im Hauptmenü, um Ihre Bibliothek zu öffnen. Um zu sehen, wie es funktioniert, können Sie nun Ihre neu erstellte Vorlage per Drag & Drop in Ihren Arbeitsbereich ziehen.
Wählen Sie nun ein einzelnes Element in Ihrem Arbeitsbereich aus, klicken Sie erneut auf ![]() Teilen/Exportieren, aber wählen Sie diesmal
Teilen/Exportieren, aber wählen Sie diesmal ![]() .
.
Öffnen Sie Ihre Bibliothek (falls noch nicht geöffnet) und klicken Sie auf ![]() in der oberen linken Ecke. Aktivieren/deaktivieren Sie die Kontrollkästchen
in der oberen linken Ecke. Aktivieren/deaktivieren Sie die Kontrollkästchen ![]() und
und ![]() um zu sehen, wie der Filter funktioniert.
um zu sehen, wie der Filter funktioniert.
NOTE Der einzige Unterschied zwischen Vorlagen und Symbolen ist die Benennung. Es hilft Ihnen, Ihre Bibliothek in zwei Bereiche zu kategorisieren. Sie sollten einfach „Vorlagen“ für alles verwenden, was nicht wie ein Symbol verwendet wird.
TIP „Vorlage“ und „Symbol“ sind vordefinierte Tags. Sie können so viele individuelle Tags erstellen und wiederverwenden, wie Sie möchten: Klicken Sie mit der rechten Maustaste auf eine Vorlage (oder ein Symbol) in Ihrer Bibliothek und wählen Sie ![]() . Geben Sie Ihren gewünschten Tag-Namen ein und drücken Sie
. Geben Sie Ihren gewünschten Tag-Namen ein und drücken Sie ![]() . Sie finden Ihren neu erstellten Tag in der Liste unten, wo Sie auch andere vorhandene Tags zuweisen können.
. Sie finden Ihren neu erstellten Tag in der Liste unten, wo Sie auch andere vorhandene Tags zuweisen können.
TIP Sie können mehrere Bibliothekselemente gleichzeitig bearbeiten, indem Sie einen Rahmen um sie ziehen oder mehrere Elemente mit Ctrl oder Shift auswählen.
Vorlagen ändern
NOTE Eine Vorlage ist technisch gesehen dasselbe wie ein normales DEON-Projekt. Sie können sie mit der gleichen Flexibilität öffnen und bearbeiten:
Doppelklicken Sie auf eine Vorlage oder ein Symbol in Ihrer Bibliothek. Es öffnet sich in einem neuen DEON-Fenster. Nehmen Sie Ihre Änderungen vor und schließen Sie einfach das Fenster, wenn Sie fertig sind. Änderungen werden sofort gespeichert, während Sie sie vornehmen (noch bevor Sie das Fenster schließen).
NOTE Obwohl Vorlagen technisch gesehen DEON-Projekte sind, erscheinen sie nicht in Ihrer Projektliste. Sie finden sie nur in Ihrer Bibliothek.
TIP Sie können SVG für Symbole verwenden. SVG ist ein Vektorformat und Vektoren werden beim Vergrößern nicht unscharf wie Pixel. DEON unterstützt SVG per Drag & Drop und Sie können Vektoren auch direkt aus ADOBE Illustrator kopieren/einfügen. Kritzeleien, Formen, Pfeile, Linien und Text, die Sie direkt in DEON erstellen, sind jedoch ebenfalls Vektoren.
Vorlagen teilen
Wählen Sie ein oder mehrere Elemente in Ihrer Bibliothek aus. Klicken Sie mit der rechten Maustaste darauf und wählen Sie ![]() aus dem Kontextmenü.
aus dem Kontextmenü.
Das Einladungsfenster erscheint. Geben Sie die E-Mail-Adresse des Benutzers ein, mit dem Sie Ihr Projekt teilen möchten, und klicken Sie auf ![]() . Die eingegebene E-Mail erscheint im Feld unten, wo Sie die Rechte für diesen Benutzer anpassen können. Klicken Sie dann auf
. Die eingegebene E-Mail erscheint im Feld unten, wo Sie die Rechte für diesen Benutzer anpassen können. Klicken Sie dann auf ![]() .
.
NOTE Wenn die eingegebene E-Mail-Adresse noch kein DEON-Konto hat, wird automatisch eine Einladungs-E-Mail mit weiteren Anweisungen an diese Adresse gesendet.
Die Vorlagen oder Symbole, die Sie geteilt haben, werden sofort in der Bibliothek der anderen Benutzer aufgeführt.
TIP Um mit mehreren Benutzern gleichzeitig zu teilen: Geben Sie mehrere E-Mail-Adressen getrennt durch Semikolons ; oder Zeilenumbrüche ein oder kopieren/fügen Sie eine Liste aus Excel oder einer beliebigen Textdatei ein.
Zurück nach oben13 Präsentationspfade
NOTE DEON ermöglicht es Ihnen, sofort zwischen Arbeit und Präsentation zu wechseln, ohne Zeit mit Exporten und fummeligem Layouten zu verschwenden.
Wechseln Sie in den Präsentationsmodus, indem Sie im Hauptmenü auf ![]() und dann auf
und dann auf ![]() klicken.
klicken.
Wählen Sie nun die Elemente aus oder wählen Sie sie mehrfach aus, die Sie als ersten Schritt präsentieren möchten, und klicken Sie auf den ![]() Schritt hinzufügen-Button im Präsentationspfad-Menü unter Ihrem Arbeitsbereich.
Schritt hinzufügen-Button im Präsentationspfad-Menü unter Ihrem Arbeitsbereich.
Wählen Sie andere Elemente für Ihren zweiten Schritt aus und drücken Sie erneut ![]() . Wiederholen Sie dies, bis Sie fünf Schritte in Ihrer Zeitleiste haben.
. Wiederholen Sie dies, bis Sie fünf Schritte in Ihrer Zeitleiste haben.
Wählen Sie nun (klicken Sie auf) den ersten Schritt in Ihrer Zeitleiste und drücken Sie den ![]() Präsentieren-Button ganz links oder drücken Sie einfach F5.
Präsentieren-Button ganz links oder drücken Sie einfach F5.
DEON wechselt in den Vollbildmodus und Sie können mit den Pfeiltasten ←→ auf Ihrer Tastatur oder Ihrem bevorzugten Remote-Clicker durch Ihren Präsentationspfad gehen.
TIP Sie können weiterhin mit Ihrer Maus, Ihrem Touchscreen oder Trackpad im Arbeitsbereich navigieren. Drücken Sie k um zum aktuellen Schritt zurückzufliegen.
Um den Vollbildmodus zu verlassen, drücken Sie einmal Esc . Um den Präsentationspfad-Modus vollständig zu verlassen, drücken Sie erneut Esc . Während des Vollbildmodus können Sie auch die Bildschirmtasten verwenden, die erscheinen, wenn Sie einmal auf den Bildschirm klicken oder ihn berühren.
TIP Sie können direkt nach dem Öffnen eines DEON-Projekts F5 drücken, um den ersten Präsentationspfad von Anfang an zu starten.
TIP Sie können Ihren Präsentationspfad in ein mehrseitiges Powerpoint- oder PDF-Dokument exportieren: Drücken Sie links neben Ihrer Präsentationspfad-Zeitleiste auf ![]() und wählen Sie
und wählen Sie ![]() .
.
TIP Sie können automatische Präsentationen erstellen, indem Sie für jeden Schritt einen Timer einstellen. Wenn der letzte Schritt einen Timer >0 hat, wird die Präsentation in einer Schleife abgespielt.
Zurück nach oben14 Kopieren zwischen Projekten
NOTE Normalerweise haben Sie mehrere DEON-Projekte gleichzeitig geöffnet. Dies gibt Ihnen die Agilität, tagsüber sofort zwischen verschiedenen Themen zu wechseln. Sie können auch ganz einfach Elemente zwischen Projekten kopieren und verschieben. Wenn Sie beispielsweise nicht ein ganzes Projekt teilen möchten, können Sie einen Teil davon in ein zweites Projekt kopieren und stattdessen diesen Auszug teilen. Versuchen Sie jetzt, zwischen Projekten zu kopieren:
Lassen Sie Ihr aktuelles Projekt geöffnet und erstellen Sie ein neues Projekt, wie Sie es in Schritt 2 getan haben.
TIP Um schnell zwischen mehreren offenen Projekten zu wechseln, verwenden Sie die Windows-Tastenkombination Win+Tab als gute Alternative zu Alt+Tab.
Wählen Sie Elemente in Ihrem ersten Projekt aus oder wählen Sie sie mehrfach aus. Drücken Sie Ctrl+C um die Elemente zu kopieren, oder Ctrl+X um sie auszuschneiden. Wechseln Sie zu Ihrem zweiten (leeren) Projekt. Drücken Sie Ctrl+V um die Elemente einzufügen.
Zurück nach oben15 Teilen und Verlinken
NOTE Das Teilen von Projekten mit anderen Benutzern ist wie das Teilen eines Schreibtisches oder eines Raumes mit ihnen. Die anderen Benutzer können das geteilte Projekt jederzeit und überall öffnen und die Elemente im Arbeitsbereich sehen oder bearbeiten (wenn Sie dies erlaubt haben).
Um ein Projekt zu teilen, klicken Sie im Hauptmenü auf den „Teilen“-Button ![]() (
(![]() in älteren Versionen) und wählen Sie
in älteren Versionen) und wählen Sie ![]() . Wenn Ihr Projekt noch unbenannt ist, werden Sie aufgefordert, ihm einen Namen zu geben. Dann erscheint das Einladungsfenster. Geben Sie die E-Mail-Adresse des Benutzers ein, mit dem Sie Ihr Projekt teilen möchten, und klicken Sie auf
. Wenn Ihr Projekt noch unbenannt ist, werden Sie aufgefordert, ihm einen Namen zu geben. Dann erscheint das Einladungsfenster. Geben Sie die E-Mail-Adresse des Benutzers ein, mit dem Sie Ihr Projekt teilen möchten, und klicken Sie auf ![]() . Die eingegebene E-Mail erscheint im Feld unten, wo Sie die Rechte für diesen Benutzer anpassen können. Klicken Sie dann auf
. Die eingegebene E-Mail erscheint im Feld unten, wo Sie die Rechte für diesen Benutzer anpassen können. Klicken Sie dann auf ![]() .
.
NOTE Wenn die eingegebene E-Mail-Adresse noch kein DEON-Konto hat, wird automatisch eine Einladungs-E-Mail mit weiteren Anweisungen an diese Adresse gesendet.
TIPUm mit mehreren Benutzern gleichzeitig zu teilen: Geben Sie mehrere E-Mail-Adressen getrennt durch Semikolons ; oder Zeilenumbrüche ein oder kopieren/fügen Sie eine Liste aus Excel oder einer beliebigen Textdatei ein.
Das Projekt, das Sie geteilt haben, wird sofort in der Projektliste der anderen Benutzer aufgeführt.
Um einen Eindruck davon zu bekommen, wie es funktioniert, wenn zwei Benutzer dasselbe Projekt geöffnet haben, können Sie eine zweite Instanz davon auf Ihrem eigenen Computer öffnen:
Doppelklicken Sie auf das kleine ![]() DEON-Taskleistensymbol. Denken Sie daran, dass ein einfacher Klick das Benachrichtigungsfenster geöffnet hat. Ein Doppelklick startet nun eine neue Instanz von DEON und ruft den DEON-Startbildschirm auf, wo Sie alle Ihre eigenen Projekte und Projekte anderer Benutzer finden, die mit Ihnen geteilt wurden.
DEON-Taskleistensymbol. Denken Sie daran, dass ein einfacher Klick das Benachrichtigungsfenster geöffnet hat. Ein Doppelklick startet nun eine neue Instanz von DEON und ruft den DEON-Startbildschirm auf, wo Sie alle Ihre eigenen Projekte und Projekte anderer Benutzer finden, die mit Ihnen geteilt wurden.
TIP Klicken Sie auf den ![]() Listenansicht /
Listenansicht / ![]() Rasteransicht-Button in der oberen rechten Ecke des Startbildschirms, um zwischen einer Miniaturansicht oder Textansicht Ihrer Projektliste zu wechseln.
Rasteransicht-Button in der oberen rechten Ecke des Startbildschirms, um zwischen einer Miniaturansicht oder Textansicht Ihrer Projektliste zu wechseln.
Doppelklicken Sie auf Ihr Projekt (das derzeit noch in der zweiten Instanz von DEON geöffnet ist), um es zu öffnen. Sie haben nun zwei DEON-Fenster mit demselben DEON-Projekt.
Versuchen Sie, in beiden Instanzen zu navigieren und Ihr Projekt zu bearbeiten. Beachten Sie, dass jede Instanz einen völlig anderen Teil desselben Projekts anzeigen kann, Änderungen jedoch sofort synchronisiert werden. Dieses Experiment zeigt, wie andere Benutzer Ihr geteiltes Projekt erleben würden.
TIPWenn Sie möchten, dass andere Benutzer Ihnen folgen und denselben Teil des Projekts sehen (z. B. während einer Telefonkonferenz), drücken Sie im Hauptmenü den ![]() Connected View Button. Lesen Sie hier mehr über diese leistungsstarke Funktion hier.
Connected View Button. Lesen Sie hier mehr über diese leistungsstarke Funktion hier.
TIPSie können einen Link zu jedem Element oder jeder Mehrfachauswahl in einem Projekt teilen: Wählen Sie Elemente in Ihrem Arbeitsbereich aus oder wählen Sie sie mehrfach aus. Klicken Sie im Kontextmenü auf ![]() Teilen/Exportieren und wählen Sie
Teilen/Exportieren und wählen Sie ![]() . Sie können diesen Link nun in jedes E-Mail- oder Chat-Programm einfügen (Ctrl+V) und an andere Benutzer senden. Wenn der Empfänger auf den Link klickt, lädt DEON automatisch das Projekt und navigiert zu den verlinkten Elementen. Denken Sie daran, dass es sich um ein geteiltes Projekt handeln muss, da der Zugriff sonst verweigert wird.
. Sie können diesen Link nun in jedes E-Mail- oder Chat-Programm einfügen (Ctrl+V) und an andere Benutzer senden. Wenn der Empfänger auf den Link klickt, lädt DEON automatisch das Projekt und navigiert zu den verlinkten Elementen. Denken Sie daran, dass es sich um ein geteiltes Projekt handeln muss, da der Zugriff sonst verweigert wird.
TIP Wenn Sie Microsoft Teams installiert haben, geht das Teilen von Links während eines Chats noch schneller. Klicken Sie im Kontextmenü auf ![]() Teilen/Exportieren und wählen Sie
Teilen/Exportieren und wählen Sie ![]() . DEON kopiert den Link automatisch in Ihr aktuell aktives Chat-Eingabefeld.
. DEON kopiert den Link automatisch in Ihr aktuell aktives Chat-Eingabefeld.
NOTE Denken Sie beim Teilen von Projekten daran, dass verknüpfte Dokumente in Ihrem Projekt nur von Benutzern gesehen werden können, die Zugriff auf den ursprünglichen Dateispeicherort haben (z. B. eine Netzwerkfreigabe), andernfalls sehen sie nur einen grauen Platzhalter.
Erstellen von Verknüpfungsschaltflächen im Arbeitsbereich
Sie können Bilder oder Screenshots in anklickbare Schaltflächen verwandeln. Die Ziel-Link-URL kann sein:
- Jede externe URL wie https://deon.de
- Jeder Dateipfad zu einer Datei oder einem Ordner wie D:meinordner oder D:meinordnerild.jpg
- Jedes Element oder jede Auswahl im aktuellen Projekt oder in einem anderen DEON-Projekt:
Wählen Sie einige Elemente in einem beliebigen DEON-Arbeitsbereich mehrfach aus, klicken Sie im Kontextmenü auf Teilen/Exportieren und wählen Sie
  .
. - Jedes DEON-Projekt: Klicken Sie mit der rechten Maustaste auf ein Projekt im Startbildschirm und wählen Sie „Link kopieren“.
- Kopieren Sie eine beliebige Ziel-Link-URL in Ihre Zwischenablage.
- Wählen Sie ein beliebiges Bild oder einen Screenshot in einem beliebigen DEON-Arbeitsbereich aus und klicken Sie im Kontextmenü auf den Button „Link bearbeiten“
 .
. - Fügen Sie den zuvor kopierten Link in das Feld ein. Sie können nun wählen, ob das gesamte Bild als Schaltfläche dienen soll. Andernfalls erscheint ein kleiner Button in der oberen rechten Ecke des Bildes.
NOTE Um eine Schaltfläche auszuwählen, die vollständig anklickbar ist, müssen Sie einen Auswahlrahmen darum ziehen.
TIP Schauen Sie sich die Jira- und Azure DevOps-Integration an, um Probleme einzufügen und zu verknüpfen.
16 Exportieren
NOTE Wenn Ihr Workflow es zulässt, versuchen Sie besser, in DEON zu bleiben, anstatt zu exportieren. Sie können die Sharing-Funktionen nutzen, um Informationen auszutauschen, und den Präsentationspfad um Präsentationen zu halten. Sie könnten auch vorübergehend Elemente in ein anderes DEON-Projekt kopieren, wenn Sie nicht ein ganzes Projekt teilen möchten, und die Dinge später wieder zurückkopieren. Wenn Sie in DEON bleiben, bleiben Sie flexibler und interaktiver und vermeiden redundante Daten. Es gibt jedoch Situationen, in denen der Export unerlässlich ist, und die folgenden leistungsstarken Exportfunktionen sind praktisch:
Exportieren einiger Elemente oder des gesamten Projekts
Wählen Sie einige Elemente in Ihrem Arbeitsbereich aus oder wählen Sie sie mehrfach aus. Klicken Sie im Kontextmenü auf ![]() Teilen/Exportieren und wählen Sie PDF oder Powerpoint als Exportformat. Um das gesamte Projekt zu exportieren, ziehen Sie einfach den Auswahlrahmen über alle Elemente. Sie können die ausgewählten Elemente auch in ihrem Originalformat speichern, indem Sie „Speichern unter…“ wählen. Wenn Sie mehrere Elemente ausgewählt haben, wird eine ZIP-Datei erstellt.
Teilen/Exportieren und wählen Sie PDF oder Powerpoint als Exportformat. Um das gesamte Projekt zu exportieren, ziehen Sie einfach den Auswahlrahmen über alle Elemente. Sie können die ausgewählten Elemente auch in ihrem Originalformat speichern, indem Sie „Speichern unter…“ wählen. Wenn Sie mehrere Elemente ausgewählt haben, wird eine ZIP-Datei erstellt.
Export in ein mehrseitiges Dokument
Verwenden Sie die Funktion „Exportieren mit Anmerkungen“ eines PowerPoint-Dokuments oder verwenden Sie die Exportfunktion eines Präsentationspfads oder verwenden Sie die Folienfunktion. Mit der Folienfunktion können Sie mehrere Folien in Ihrem Arbeitsbereich platzieren. Diese Folien können später in eine mehrseitige Powerpoint exportiert werden, nachdem Sie Texte, Bilder, Kritzeleien und Formen darauf erstellt haben. Um den Hintergrund dieser Folien anzupassen (z. B. mit Ihrem Firmenbranding), können Sie POTX-Dateien importieren. Sie können einfach Ihre eigenen POTX-Dateien erstellen, indem Sie eine Powerpoint als POTX anstelle von PPTX speichern.
Um Folien in Ihrem Arbeitsbereich zu erstellen, klicken Sie im Hauptmenü auf den ![]() Widgets-Button, dann auf den
Widgets-Button, dann auf den ![]() Neue Präsentationsfolie-Button und klicken Sie irgendwo in den Arbeitsbereich. Wählen Sie eine Vorlage und ein Layout und klicken Sie auf
Neue Präsentationsfolie-Button und klicken Sie irgendwo in den Arbeitsbereich. Wählen Sie eine Vorlage und ein Layout und klicken Sie auf ![]() .
.
Um weitere identische Folien zu erstellen, halten Sie Ctrl gedrückt und ziehen Sie eine Folie (oder mehrere mehrfach ausgewählte Folien).
NOTE Folien können nicht skaliert werden. Dies hilft Ihnen, ein konstantes Größenverhältnis zwischen mehreren Seiten beizubehalten.
Erstellen Sie nun Inhalte auf den Folien oder ziehen und skalieren Sie vorhandene Inhalte darauf.
Wählen Sie alle Folien mehrfach aus, klicken Sie im Kontextmenü auf ![]() Teilen/Exportieren, wählen Sie
Teilen/Exportieren, wählen Sie ![]() und klicken Sie auf
und klicken Sie auf ![]() . Die Reihenfolge der Folien in der exportierten Powerpoint wird durch ihre Position im Arbeitsbereich definiert (von links nach rechts oder von oben nach unten).
. Die Reihenfolge der Folien in der exportierten Powerpoint wird durch ihre Position im Arbeitsbereich definiert (von links nach rechts oder von oben nach unten).
17 Versionierung
NOTEDEON ist ein befehlsbasiertes System. Das bedeutet, dass jede einzelne Aktion wie ein Strich oder das Verschieben eines Elements sofort als Befehl gespeichert wird und ein DEON-Projekt das Ergebnis einer Abfolge von Befehlen ist. Dieses Prinzip ermöglicht es Ihnen, jederzeit eine Kopie eines Projekts aus jedem Stadium seiner Entstehung wiederherzustellen. Ein Grund könnte sein, in die Vergangenheit zu schauen oder ein Projekt wiederherzustellen, das versehentlich von einem Benutzer durcheinander gebracht wurde.
Wechseln Sie zum Startbildschirm, indem Sie in der oberen linken Ecke eines offenen Projekts auf ![]() klicken oder auf das kleine
klicken oder auf das kleine ![]() DEON-Taskleistensymbol doppelklicken. Klicken Sie mit der rechten Maustaste auf ein Projekt und wählen Sie
DEON-Taskleistensymbol doppelklicken. Klicken Sie mit der rechten Maustaste auf ein Projekt und wählen Sie ![]() aus dem Kontextmenü. Navigieren Sie nun durch die Verlaufsliste, indem Sie auf die
aus dem Kontextmenü. Navigieren Sie nun durch die Verlaufsliste, indem Sie auf die ![]() Buttons klicken, um einen Baum bis zu einer gewünschten Revisionsnummer vollständig hinunterzugehen. Klicken Sie danach auf
Buttons klicken, um einen Baum bis zu einer gewünschten Revisionsnummer vollständig hinunterzugehen. Klicken Sie danach auf ![]() . Warten Sie, während die Kopie des Projekts erstellt wird. Sie werden möglicherweise gefragt, ob Sie diese Kopie mit denselben Benutzern teilen möchten, die bereits Zugriff auf das ursprüngliche Projekt hatten. Danach erscheint das wiederhergestellte Projekt in Ihrer Projektliste.
. Warten Sie, während die Kopie des Projekts erstellt wird. Sie werden möglicherweise gefragt, ob Sie diese Kopie mit denselben Benutzern teilen möchten, die bereits Zugriff auf das ursprüngliche Projekt hatten. Danach erscheint das wiederhergestellte Projekt in Ihrer Projektliste.